Learning a New Handgun

So you decided it’s time to change competition guns? Maybe you saw your favorite shooter laying down impressive rates of fire and want “their” gun. Maybe you were shooting your carry gun and wanted a competition oriented gun. It could be that you carry a Glock but really love the 1911 and want to shoot Single Stack. Perhaps you are like me; you wanted your USPSA Production gun to be steel, ensuring a venture into DA/SA territory.

The reasons we might change competition guns are as myriad as there are actual guns suitable for competition. In 2015 I changed from a 9mm XD Tactical to a 9mm CZ P-09 and then to a 9mm Tanfoglio Limited Pro; all in the span of 6 months. In doing so I learned three glaring pieces of knowledge.

  1. You will waste lots of money on ammo, holsters, mags, and accouterments; all while you never grow beyond your baseline skill set.
  1. Unless you are just changing to a larger version of your current gun (Glock 19 to Glock 34), you will always be working to gain your skills back to where they were prior to the swap.
  1. The top shooters in the world can go from a 1911 too a striker fired gun, then too a revolver with little training fanfare.  Odds are very good that you are not one of the top shooters in the world!  It will take more time for you to “relearn” each time you change.

I firmly believe the best shooters in the world got there by sticking to one gun or platform during the formative years of their competitive shooting. Once you have a good baseline skill set and can develop a solid stage plan, then the effects of a gear change are less obvious to the observer. Still, changing competition guns are an inevitability for many. Some are just chasing the newest fashion; others do so for more legitimate reason. I offer this to help you learn your new friend as quick as possible.

Draws

The first thing you will notice after changing guns is the difference in the draw. The gun may weigh the same but other factors come into play. The grip angle, the slide length, hell, even the actual holster design can befuddle us. To offset this I like to start over and go slow.

When learning a new competition gun I will put the timer away for a couple of weeks. I will take 3 or 4 dry fire sessions, approximately 15 minutes each, and  only work on the draw stroke. I am not one to believe “slow is smooth, smooth is fast” but in this case we are trying to achieve slow AND smooth excellence. I like too do a controlled draw AND a controlled re-holster. This is a good time to “tune up” your fundamentals and identify any bad habits you may have had. There is no reason to transfer the bad habits over to your new gun!

Does your support hand meet the gun at the appropriate place? Are you sure?

Clap your hands. Feels natural doesn’t it? That is where I like for my hands to meet. Some people like to race the support hand to the holster. I have tried that and noticed no measurable difference on the timer; so, I went with what felt more natural and relaxed. Of course, your mileage may vary.

After doing slow draws for a few days I speed up. I take my last known dry fire draw time, add 0.2 seconds and start working it out. Within a session or two you should be really close.

Magazine Changes

No, I don’t mean putting new reading material in the bathroom. Although that is important!

I mean mag changes in the gun. To be honest, this may or may not be an issue. When I went from the XD to the P-09 my times actually improved as a result of the P-09’s generous mag opening. Going from the P-09 to the Tanfo was an absolute train wreck. I have heard countless people say loading a metal gun is more difficult and they are correct! It is not the mag opening that causes problems though; no, it is friction on the sides of the mags when you aren’t precise with your insertion.  How do we get better at mag changes?

Two words: Burkett Reload!

The Burkett Reload was designed by Matt Burkett and it works. You can read more about the drill here. But when starting after changing guns, I like to do Burkett Reloads slow and smooth. I will generally do 5 minutes of slow Burkett Reloads followed by 5 minutes of slow, full-on reloads and return to sight picture. I will do this for 5 days. The improvements are astonishing!

Transitions

Similar too mag changes, you may find your transitions are not affected. Then again you may find them to be slower. This is especially true if you changed to a heavier gun. To quickly learn (relearn?) transitions I steal the advice of Steve Anderson. Use a metronome. If you don’t play musical instruments you probably don’t have a metronome lying around. Don’t fret! Apps abound and they are often free.

Metronome

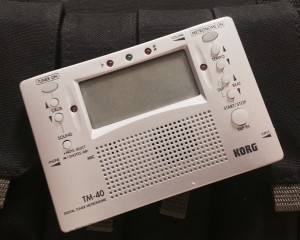
I like to set the metronome at a slow and comfortable pace and then set a regular countdown timer for 3 minutes. Start on a target and then transition to another in rhythm with the metronome. I promise 3 minutes will be enough for one session as your arms and shoulders will now hate you!

Doing this for a week should be good enough. Each session try to go a little faster.  I don’t use a metronome regularly, but I find it helps build muscle and help you brain learn the transition influences of your new competition gun.

There you have it. Three methods I have used with great success when changing competition guns. You will notice the absence of trigger training. That is by design. Learning the new trigger will be dependent on the type, the quality of the trigger and what you were used too.  Once I finish these drills I resume regular dry and live fire and really get to know my new gun.

Changing gear often drives us to practice more. Hopefully these tips will help you make your practice productive, quicker.

Rock Island Armory Ultra FS 9mm update

1,074 rounds. That’s how many rounds the Rock Ultra FS 9mm has gone through, and oddly enough that’s the same number of rounds it’s fired without a single failure of any type. This gun is blowing my mind. It’s passed the 10-8 Performance Test, passed the 100 round challenge, I set a PR on Bill Drills with it, and it just keeps running. Sure, the fit and finish isn’t as nice as the Springfield, and it costs more than the Taurus, but it’s done several things that neither of those guns were able to do. It’s got it where it counts for me, and that’s performance. It runs. It’s accurate. It’s reliable. In fact, it’s the best 9mm 1911 I’ve tested so far.

I have now crossed over into the camp of rooting for this gun hardcore. I’m still going to continue to subject it to our object test protocol, but now I really want it to go the distance to 2,000 rounds without an issue. How cool would that be? A 1911 that’s ready out of the box for IDPA or USPSA for less than $700? It has a magwell, good grips, fiber optic sights, adjustable rear sights, it’s everything I want (except forward cocking serrations).

Dear Rock Island Armory: I don’t know what kind of devil magic you put in this gun, but please put it in all your guns from now until the end of time.

If you like our videos and blog posts, please consider supporting us on Patreon. A couple of bucks a month goes a long way towards our goal of making Gun Nuts an ad free paradise where we’re free to discuss the topics you want.

Evaluating a New Handgun

In my series on The Folly of Chasing Gear and The Folly of Chasing Gear – CCW Gun, I revealed that I have changed my CCW gun a myriad of times and I switched competition rigs three times. I never recommend swapping carry (or competition) guns that frequently; nevertheless, I have developed a reasonable method for evaluating and then learning a new handgun. Humans on whole, are stubborn, and will chase the newest trinket, even though evidence proves we should not. With this in mind, I have decided to pass on my methods. I have broken this topic into two articles. The first, this one, will cover the evaluation phase which crosses the boundaries of CCW and Competition. The second article will be on methods that I have used to “learn” your new competition gun faster.

When we first get a firearm, after the initial excitement wears off, I tear them down, inspect and clean them, and then slather them with my favorite lube. I do this no matter the gun. In the past I tried the “from the store to the range” thing and on more than one occasion it resulted in malfunctions that could have been prevented with a little cleaning and lube before the first range session.

For the first rounds shot through any handgun, even a competition firearm, I head to a well-lit square range and bring at least 200 rounds of quality practice ammo. I will generally take two different bullet weights and shoot the same drills to see if the gun prefers one to the other.

For the drills, I shoot some close range bullseye, some long-range bullseye and I will generally do some other accuracy base drills, such as a Dot Torture drill. It is important to note that none of these drills involve a par time. After that I will run some rapid fire, maybe 12-15 rounds worth. Next I will load a round, remove the mag and ensure there are no extraction/ejection issues, I do this at least ten times. Finally I shoot it strong hand and weak hand while intentionally limp-wristing it, trying to make it FTF or stove-pipe.

Drawing1 Model (1)

Doing this provides me feed-back in the following areas.

Reliability

Is the gun unreliable? Does it malfunction without the mag? Does it malfunction while being limp wristed? If the answer to any of those questions is yes, then I generally stop here and try some different ammo. If I still have failures then it is time to do some soul-searching and determine why. Did I purchase a piece of junk (Kel-Tec) or is it just a lemon from a known good brand? An example of a lemon would be a first series Gen 4 Glock with Brass to Face issues.

Recoil Control

How does the gun handle and recover in recoil? I will openly admit this is subjective and those who are new to shooting will find this less meaningful than an experienced shooter. So I mention this with the presumption that the reader knows how to properly grip and drive the gun. Does it recoil in linear fashion or is it all over the place? Do the sights return to aiming point each time?

If it is miserable to shoot and it causes you to flinch, this is the time to identify it. Read: S&W J-Frame AirLite in .357

For a production based competition gun this isn’t important as the recoil spring will be tweaked anyway. For a purpose-built competition gun, like a 2011 or an Open gun, then it better damn well be perfect!

Accuracy

More accuracy is better – ALWAYS! This will be predicated by your own skill level, but the gun should at least make you look good. If the target looks like you shot it with .355 diameter buckshot, something is wrong. Perhaps the trigger is crap? Perhaps the gun hates the ammo? Perhaps the gun is crap? A crappy trigger is easy to tell but bad or the wrong weight ammo takes some experimentation. A gun that is a flat-out turd can be harder to diagnosis without more ammo. This provides solid reason to research your purchase and flat-out avoid the cheapo, bottom-of-barrel guns.

While on the subject of accuracy, we need to determine of the sights are regulated for preferred sight picture. I don’t believe this is a pass/fail proposition as much as an indicator that you might want to change sights. I denounce 3-dot sights when I can, so I basically have to change or modify the sights on every gun purchased.

Ergonomics

While shooting did the gun bite you? Does the gun make you bleed? This could be caused by something as simple as a sharp edge that can be easily blended, or it could mean the firearm doesn’t fit you and likely never will. As a rule I don’t keep firearms that draw my blood while shooting.

Are the controls reachable? If you can’t reach the mag release then you may have problems. Is your grip keeping the slide stop from engaging (SIG)? These are very personal things to evaluate and honestly, most of this can be worked out at the gun store counter, long before you fill out the Form 4473.

Finally, how does it carry? Of course, this requires a holster. To be honest I don’t buy a holster until I am sure I like the gun and I have a solution to the sights either planned or ordered. Once I know I will be keeping the gun, I will order a holster that suits my needs. I have found you can carry a lot larger gun than you would expect by having the correct holster and a good belt, but alas, that is a thought for another day.

Using these methods a person can rather quickly determine if a firearm will be their forever friend or a bitter regret; one they re-live with each trigger pull. For those that shoot competition, my next article will go over some things I have done that have shortened the learning curve after changing platforms (ooh, sounds tactical).

Photo of the day: A Dirty 1911

There are a lot of misconceptions about the 1911 floating around on the web. One of them is the idea that the 1911 is a delicate little princess that can’t function if she’s dirty. In truth, a properly built 1911 will run dirty if it has been properly lubricated. On Saturday I stopped by the excellent Elite Shooting Sports facility and in the space of an hour working on recoil control and sight tracking blew through over 450 rounds through my 9mm Wilson CQB. The picture tells the tale…this is no princess. She’s a very dirty girl.

It’s at the point now where handling the pistol leaves crud on my hands, so I’m actually going to break down and clean her up. Saturday’s outing pushed the round count through my CQB to over 4,000. That’s more than 4,000 rounds without cleaning. All I’ve ever done is properly lubricate the pistol with Wilson’s Ultima Lube and occasionally wipe down the outside of the pistol to keep the black crud off my clothes.

A properly made 1911 will still run if it’s dirty. A spotlessly clean 1911 will shut down in short order if it isn’t properly lubricated. I’ve been on the line with a lot of 1911 pistols over the years, including attending courses dedicated to the 1911 pattern pistol. Most made the mistake of lubricating their 1911 like it was a Glock…meaning they use minimal or no lubrication at all. Invariably those people ran into problems inside the first 150 rounds. An all metal pistol, even one with a neat high-tech finish that provides some lubricity (like Wilson’s Armor-Tuff finish on this pistol) needs proper lubrication to function. Especially if you do crazy things like burn 450 rounds through the gun in an hour’s time because you happen to be near the range and have a case of ammo in your trunk.

Wait…you don’t drive around with 1,000 rounds of ammo in your trunk? What kind of heathen are you? (Note: this is a joke. If you write me claiming you were microaggressed by this statement I’m going to laugh at you with all of my friends)

To be clear, I’m not arguing that what I’ve done here is a best practice because it most certainly isn’t. Only cleaning your gun every 5th case of ammo is not really a good idea. I didn’t set out to do this because it’s a good idea or because I was trying to prove a point. I’ve just been too damn lazy to clean the gun. So now it’s time to be a responsible adult and properly clean the beast.

…although I kinda like the stripe pattern that’s formed on the muzzle.


Buy a Trauma Kit

Saturday night three officers from the Prince William County police department responded to a domestic disturbance call. Crystal Hamilton had called the police on her husband. He murdered her…in front of her child…before the police arrived on scene. As the three officers approached the door the murderer opened fire on them. All three officers were hit.

Unfortunately Officer Ashley Guindon was killed. It was her first day on patrol.

The story made national news…but what didn’t make national news was the content of the radio traffic from the incident. If you listen to the radio traffic you will hear the dispatchers and officers calling for trauma kits on the scene.

People assume that every police cruiser is equipped with medical supplies and the officer in it has relevant training to deal with traumatic injury. The truth is that only a very small percentage of police officers have been trained in anything beyond basic Red Cross First Aid…if they’ve even been trained on that. A number of former military personnel working as police officers have been through the excellent Combat Lifesaver Course and have the knowledge, but aren’t individually issued a decent trauma kit to go along with it. Police departments are beginning to see the light and are starting to equip and train their officers to the point where they can do something about combat style injuries like traumatic amputation and massive bleeding caused by weapons or shrapnel…but the knowledge and the equipment isn’t universally available.

To put it bluntly, you cannot expect that the first responders on the scene of a terrible act of violence are equipped to provide life saving care to a victim. You can listen to the radio traffic from this incident yourself and hear that even the police had to call for trauma kits to the scene when their own officers were fighting to survive.

Please buy a trauma kit.

You cannot expect that if you are hurt or injured that somebody else will have one. Not even the police. Not even the EMTs. I’ve discussed this with a number of volunteer EMT’s in my area and none of them have tourniquets or hemostatic-agents like Combat Gauze or Celox Rapid-Gauze on hand…nor have they been trained in the use of these items.

Even if you haven’t been trained on how to properly use these items, there’s nothing to say that somebody on the scene couldn’t make use of your kit. I’ve been at the scene of a number of injuries where there was somebody with the training to help, but they didn’t have any equipment handy. Being able to throw a doctor or EMT or police officer a trauma kit when people are on the ground bleeding could mean the difference between life and death for the injured person. Or for you. Or perhaps for someone you care about.

There are a number of companies who make a good ready-to-go kit containing most of the essentials.

I keep a TacMedSolutions Operator’s IFAK (Individual First Aid Kit) handy in the bag I use to transport my laptop at work. I’ve augmented the kit with some compressed gauze, better shears, another pair of gloves, another SOF-TTW tourniquet, and two flat packages of Combat Gauze. The picture for this article is actually my kit after I had to break it out to deal with a severe cut I happened to be on scene for. The little bag is full to bursting with the extras but the tough nylon case holds everything securely.

Another good kit is the one made by Dark Angel Tactical. Their Direct Action Response Kit is also very well equipped and their website allows you to customize the kit and even upgrade to a SOF-TTW tourniquet at no extra charge. (I much prefer the SOFTT tourniquets to the CAT tourniquets as I find them easier to use on myself and someone else.)

I would certainly encourage you to get into appropriate training to learn how to use these kits (Greg Ellifritz of Active Response Training, for instance, puts on an excellent and affordable class) but even if you don’t have the faintest idea how to use the gear being the guy that has it handy can make all the difference for someone in a very bad situation.


Rock Island Ultra FS: 100 round challenge

The idea behind the 100 round challenge is simple: load up 10 mags, shoot 100 rounds as fast as possible. There’s no real training value to it, but there is testing value. When we subjected the Springfield Armory RO to this test, it didn’t do well. The Rock Island on the other hand passed with flying colors. That’s another objective performance metric where the Rock Island has beaten the Springfield. Weird.

So far the Rock Ultra FS 1911 in 9mm has fired 826 rounds and passed the 10-8 Performance Test. As a benchmark, Tim’s Wilson Combat was perfect at this same round count, the Springfield had failed the 10-8 Test and suffered 5 malfunctions, and of course the Taurus had also failed the 10-8 test and experienced 7 malfunctions. So far the Rock Island 1911 has passed the 10-8 test as mentioned and gone through exactly zero malfunctions of any type.

I continue to be impressed by this gun! Of course, just to make sure my biases are out there, I’m also really rooting for it. I was rooting for the Taurus too, because I absolutely want to live in a world where a budget 1911 is awesome; obviously that turned out to not really be the case with the Taurus, but things with the Rock are shaping up nicely.

If you like our videos and want to see them continue, please consider supporting us on Patreon. For as little as a dollar a month, you can help feed my expensive whiskey habit and feed my dog expensive kibble!

Lee Pro 1000 Reloading Press – Improvements and Mods

Now that I have given a long-term review of the Lee Pro 1000 I felt it only fair to provide some mods and improvements I have made.  It is my hope that those who own this press, or are contemplating purchasing it, can get use these to get the most out of the press. I will list the mods in the same order as the cons were listed in my review article.

Case Lube – my first suggestion isn’t a modification and is applicable to all reloading presses. Buy and use Hornady One-Shot spray case lube! You don’t have to be super precise with the application. The following method works well for me.

  1. Spread the brass out on an old cookie sheet.
  2. Sparingly spray One Shot.
  3. Return the brass to the loading bin.
  4. Spray some One Shot into the resizing die. Every 1000-1500 rounds apply a little more to the die. Pro Tip: when spraying One Shot into the die, place a rag below the die to catch the grime that will run out.

Lube the Press – my second improvement is to lube the press. I use oil on the ram and the hex bar that controls the indexing. I do not recommend grease; I tried it and there was no improvement over oil and it made a mess.  My press is currently lubed with Valvoline 5W-20 from my last oil change, I think…

Just put a little on your finger and wipe the surfaces.  I have not found it necessary to lube the handle mechanism as there is enough play to ensure ease of function.

Case Feeder – Now we’ll get into the meat and potatoes of improvements and I’ll make the first mod  simple – remove the case feeder, and Z bar. Yes the cyclic rate will be lower, but I have seen a consistent 50% improvement in rounds per hour. This is because you are no longer fighting the case feeder. This also allows one to briefly inspect each case prior to placing it into the machine and catch the damn 380 ACP brass or those with crimped primer pockets.

IMG_5491

Case Feeder Removed

Primer Feed – There are two worthwhile mods you can make to improve the primer feed. The first is to ensure the two piece chute retains its shape. I chose to do so with zip ties as seen in the photo below.

IMG_5481

Note the Zip Ties

The second improvement is to put a zip tie on the upper primer feeder “activator”. The primer feed mechanism uses a rod that comes out the side and “kicks” off of two groves as a means of ensuring primer flow. It is a Rube Goldberg setup that works better with the zip tie as shown below.

IMG_5492

Ugly, Rube Goldberg and Effective!

To keep the primer feed from jamming up due to errant powder see the shell plate stop/locator mod below. Oh, as I noted in the first article, a can of aerosol duster for keyboards is your friend here!

Shell Plate Stop/Locator – There is not much we can do to correct the spring-loaded detent without major redesign. I tried to trim the spring and relieve the tension but that led to inaccurate shell plate indexing.

The trick is simple. Place your finger over the powder charged round as the shell plate rotates. This is best seen in the video below. It is easier to do once the case feeder is out-of-the-way.

Powder Measure – I’ll be honest, I don’t have a good answer here. I know Lee has introduced a new powder measure called the Lee Auto Drum but I have been hesitant to invest in it since my goal is to upgrade in the next few months.

Triangle Tactical does a review of the powder measure here for anyone interested.

Case Ejector – This wasn’t mentioned in my first article but it is a simple and effective mod. Basically it involves bending the case ejector rod similar to that shown below. The rod bends like a coat hanger so have no fear and bend away.

IMG_5478

Tweakin’ (wait, what?)

Below is a not very good quality video of me loading about 10 rounds on my press. At this rate I can load 300-350 an hour. This puts the loading in the ballpark with a Dillon Square Deal B. The press now produces decent ammo that is accurate enough for action shooting, defensive training and plinking. It is not going to bullseye accurate, but frankly if you are shooting bullseye you are probably loading on a single stage so you can control every aspect of the process.

The Lee Pro 1000 is an affordable press that can be made to run decent and can easily provide enough ammunition to shoot 1200-1500 rounds a month. As it sits I have about a 5% rejection rate when I case gauge the ammo. That doesn’t mean the ammo won’t fire or function, it just means it MAY not feed properly.  I relegate those rounds to training only.

Even with the mods the single biggest drawback remaining is the fact the press uses three dies instead of four. Presses that run four dies can use a Factory Crimp Die in the 4th stage to ensure case uniformity. In my experience, a Factory Crimp Die would drop the rejection rate to practically nothing.

In the end it is all about what you can afford and what you want to do. If you can afford a better press, I would suggest you do so. If you shoot more than 1500 rounds a month, I would look elsewhere. If you want to shoot multiple calibers each month, I would look elsewhere. If you are starting out and limited on funds but want to move up from a single stage this might be the press for you, if you are willing to tinker with it and learn its idiosyncrasies.

As for me? I shoot a Tanfoglio which are known for tight chambers; that dictates the need for a four stage press and a Factory Crimp Die.  I plan on moving up (to the East Side?) sometime this year.