As a follow on to my last article, Setting (and Tracking) Realistic Attainable Goals, I wanted to give some drills that will improve your pistol shooting with a target distance of 3 to 7 yards. Some of these will work at a stodgy square “bowling alley” range and others require a more permissive environment.
Bullseye Mode
This is the simplest and works at any range. The goal is to shoot the smallest group possible at any distance. For this drill I recommend cardboard because paper will have a tendency to tear out and make the group appear larger than it actually is. Start close and work your way back. I normally do a run of 6 rounds. You will not get fast with this drill; you need not draw from a holster. The goal is sight alignment, trigger press and breathing.
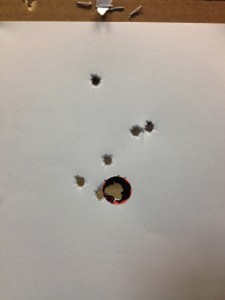
If this is what your 3 yard group looks like, you need more practice!
This is the number 1 static range drill and everyone reading has probably done it, but I would suggest you try it again, but set a minimum time between shots. Say 10 seconds. That is enough time to bring the gun down, take a few breaths and aim again. You might find you are capable of better accuracy than you thought!
Dot-Torture Drill
This drill was created by David Blinder at personaldefensetraining.com and can be found here. The instructions are printed on the target, so I won’t waste our time repeating them here. With no time limit required this drill is good for a static range that doesn’t allow rapid fire. If you can’t draw from a holster, use low ready. Once you can clear it at 3 yards, move back to 5. This drill requires a decent understanding of sight alignment and trigger press fundamentals.
Garcia Dots (or The Dots)
This drill was created by Frank Garcia and is recommended by many USPSA shooters and trainers. It is often confused with Dot-Torture but the only similarity is the size of the dot. This drill uses six 2 inch dots arranged in two rows of three. You need a shot timer and you must set the par time to 5 seconds. Upon the beep you draw and shoot 6 rounds into a single dot. You then continue with each remaining dot using the same par-time. Your actual time is irrelevant as long as you can beat the par beep. The goal is all six shots either within or touching the 2 inch circle. The drill is a total of 36 shots and it is scored as misses/shots fired, or 30/36, if you had 6 misses.
The drill is designed for 7 yards, but you should start at 3 yards and work back. Consistently cleaning the drill at 7 yards is difficult for the best shooters, so don’t get discouraged.
You can mix it up and shoot some dots strong hand only, some weak hand only, etc. When modifying the drill I shoot it a few times and see what my average time is, and then I set the par for 0.5 seconds less.
In all honesty I shoot this drill virtually every time I go to the range as a means of warm up. I feel it is a much better training aid than the Dot-Torture, but with its draw and rapid fire requirements it is not usable at most static ranges and it is not for beginners.
Doubles
This is simple drill that helps build speed. It can be done at any distance, but for maximum speed training I use 3 yards. The drill is simple; you draw from concealment and put two shots into the target as quick as you can identify two sight pictures. This is NOT A DOUBLE TAP! A double tap is two shots with one sight picture and normally leads to one shot in the center of the target and the other in the upper region of the target.
It is worth mentioning that some people like to perform a similar drill but only shoot a single round. I have done that and found you can cheat your sight picture and get lucky. Shooting two shots requires you identify the sight picture with each trigger pull.
With this drill you see a flash of a sight picture, fire and the moment the sights are aligned you pull the trigger again. For a target I use a USPSA Metric target or a 6” x 10” box on a piece of printer paper.
My first attempt at this drill was in Ben Stoeger’s Fundamentals class and he made a joke about using a sun dial. Now, using my USPSA Production gear I can average a 1.05 on the drill with good center A-zone hits. From concealment my speed drops to around 1.5 or so, but that is a function of a concealed IWB draw. I promise I didn’t start off that quick – this drill works!
If your range won’t let you draw from a holster you can start at low ready and practice the draw in dry fire. You don’t get the full effect of grip and draw, but you still get the training on sight alignment at speed.
Bill Drill
What type of 7 yard drill list wouldn’t include the quintessential drill? The original Bill Drill, as told by Rob Leatham (go to 1:32 on this video to hear Rob talk about the creation of the drill) was to draw and fire 6 shots into a IPSC A zone as quick as you can get the hits. This drill works on the draw stroke, sight alignment, recoil control and trigger press. You must have all of the fundamentals squared away to accomplish this drill in less than 2.5 seconds. From concealment, using my S&W Shield, I generally run a 2.2 – 2.3. With my USPSA rig I get 2.00 flat. I have gone faster, but that is not the average.
This drill is really fun but there are some downsides; you must have a rather liberal ran to do this drill for one and this drill will eat ammo. 10 runs, which is my minimum for this drill, will eat 60 rounds. But what a way to burn ammo!
For more information here is Caleb explaining and shooting the Bill Drill.
Four Aces
This is the final drill I consider a close range skill builder. It tests your draw, sight alignment, recoil control, ability to quickly change a magazine and then get back on target. This drill is performed at 7 yards and consists of drawing and firing two rounds into an IPSC A zone or similar sized target, performing a mag change and then firing two more rounds at the target. As designed the gun does not go to slide lock during the mag change, but it is entirely acceptable to do so, just ensure you are consistent each time.
So there you have it, six drills that I have found work wonders within the 3-7 yard range. This list is not comprehensive and a quick search on the internet will reveal an overwhelming amount of drills. Frankly a great many of those drills are crap! The goal of this article was to give the new shooter, or any shooter looking to improve, a solid set of drills to start with. In the next article I’ll give some drills that build your skills at what I consider medium and long-range.
Great post. Excellent point about two-shot draws. Completely different effect than working one-shot draws.
Can anyone see anything wrong with modifing the Garcia dots? We’ve got a bunch of (a couple cases of them) the old 11 bullseye NRA A-17 targets at the range.
I’ve been doing 5 shots per bullseye at 5-10 yards. Am I missing something here to get better?
First question, no. Second question, a really tight PAR time.
Thanks for the advice I’m working on the par times issue, the real problem there is up until this year shooting basically shut down where I live from about November to about late April/early May. Even with the dry fire that hurt my times and accuracy… So yeah it’s rebuilding time!
The 5 ring on the A-17 is 1.817 inches, which is a little smaller, but you are shooting 5 instead of 6 rounds. I would set the Par time to 4.5 seconds and start at 3 yards. When you can clean the majority of them reliably, move back to 5 and so on.
If I start my session with that drill, I can’t reliably clean 36/36 at 3 yards. i generally get 30/36 or so. If I move back to 5 yards the result is similar. It is normally the first dot I screw up worse on, then I warm up and do better. The last one is tough because you want to clean it but you want to rush as well. If I shoot it after 50 or so rounds I can clean the 3 yard run easy. That is why I start with The Dots.